

How to make authentic traditional Roman maritozzi filled with whipped cream using a stand mixer
I’ll confess something you might not expect: for years, rich, buttery, large yeasted doughs were my ultimate kitchen nemesis.
I worried that without a professional bakery setup, it would be impossible to properly develop the gluten structure, and I dreaded the long waiting hours even more.
If your sweet buns tend to flatten out in the oven instead of rising high, or if—like I used to—you worry about messing up each step, this recipe is here to solve all your doubts.
The secret to this preparation lies in the gradual addition of butter, which allows the dough to absorb the fats without collapsing, even when worked with a simple household stand mixer.
Above all, I’ve learned that yeasted doughs are much more forgiving than we think—and most importantly, they don’t need to be hovered over constantly like fragile eggs!
While the dough rests and transforms, you can take care of other things without needing to check every second.
In this guide, I’ll show you how to manage temperatures and resting times to turn a few simple ingredients into a masterpiece of Roman pastry-making, ensuring a fragrant, light, and incredibly soft result for days.
Save the recipe and try them right away!
Fluffy Roman Maritozzi Recipe (Sweet Cream Buns)

Ingredients: Roman Maritozzi
For the Dough:
For the Optional Whipped Cream Filling:
Tools
Instructions: Roman Maritozzi
1. Activation and Start
Dissolve the yeast and honey in the lukewarm milk directly in the stand mixer bowl. Let it sit for 10 minutes. Add the sugar, eggs, and lemon zest.
2. Dough Development with the Hook Attachment
Attach the dough hook. Add all the flour and mix on speed 1. Once the flour is absorbed, increase to speed 2 and knead for about 5–7 minutes until the dough begins to “clean” the sides of the bowl and climb up the hook.
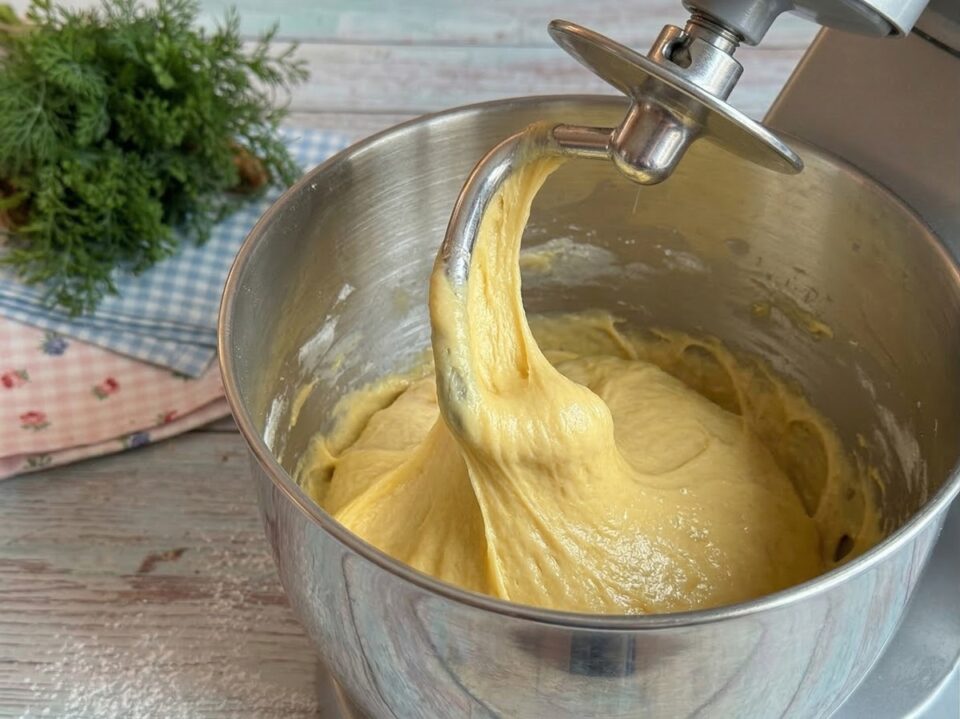
3. Incorporating the Butter
With the machine running, add the softened butter a small piece at a time. Wait until the previous piece is completely absorbed into the dough before adding the next. This is where the stand mixer makes all the difference: the texture will become glossy and silky.
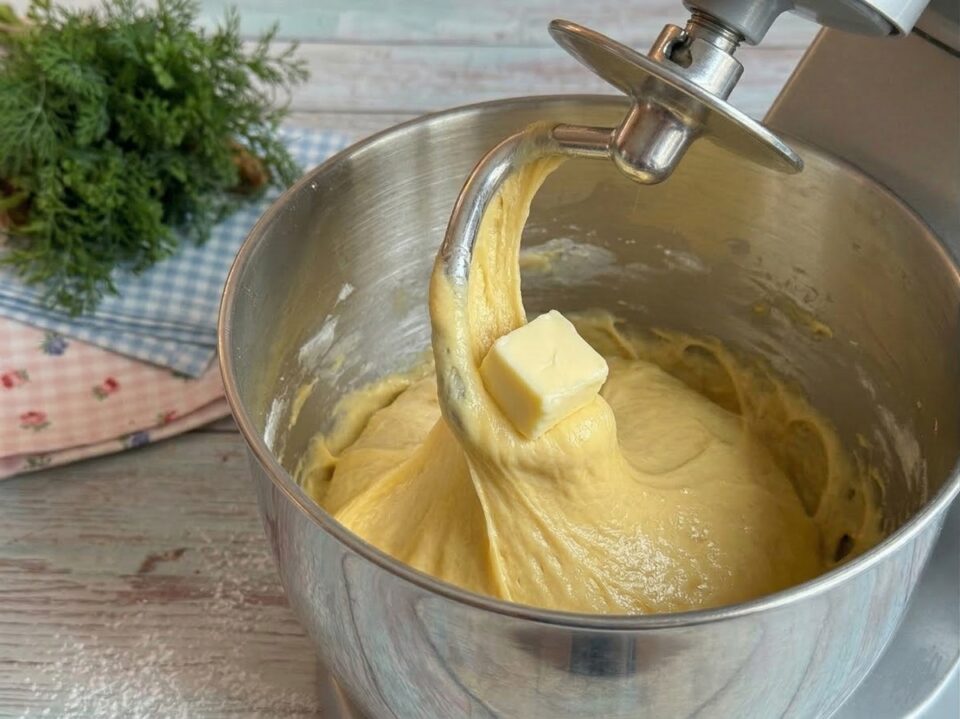
4. Salt and Final Finish
Finally, add the salt and knead for another 2–3 minutes. The dough should completely pull away from the bottom of the bowl. Perform the “windowpane test”: stretching a small piece of dough should yield a translucent membrane that doesn’t tear easily.
5. Risings
First Rise: Cover the bowl and let the dough double in size in a warm spot (about 2 hours).
Shaping: Divide the dough into 90–95 g portions, shape them into smooth balls (pirlatura), and place them on a lined baking sheet.
Second Rise: Cover and let rise for another 2 hours.

Baking
Bake in a preheated oven at 180°C (350°F) for 15 minutes. Remove from the oven and let cool completely. At this point, you can enjoy them plain, simply dusted with powdered sugar.

Filling: The Secret to Dense Cream and a Clean Cut
To transform the brioche buns into true Roman maritozzi, fill them generously. The whipped cream must be firm, glossy, and abundant. Just whipping it isn’t enough: the secret is using ice-cold cream straight from the fridge and not overdoing the sugar so it doesn’t overpower the lemon and honey aromas of the dough.
Whipped Cream Quantities: 500 ml heavy liquid cream (at least 35% fat content), 50 g sifted powdered sugar, 1 teaspoon vanilla extract.
Preparing the Cream: Pour the ice-cold cream into a bowl (if possible, chill the beaters and bowl in the freezer for 10 minutes beforehand). Start whisking at medium speed, and once it begins to foam, add the powdered sugar and vanilla. Continue whipping until you get a firm, dense consistency—it should cling to the whisk without dripping.
How to Cut and Fill: Wait until the maritozzi are completely cool, otherwise the cream will melt instantly. Make a deep longitudinal cut down the center from the top, without cutting all the way through to separate the two halves. Gently open the bun and fill it generously using a piping bag or a spatula.
The Finishing Touch: Run a smooth spatula or the back of a knife across the cream to level it flush with the edges of the brioche, removing any excess. Dust with a final layer of powdered sugar, and they are ready to serve!
Ingredient Notes and Substitutions
Milk: You can use whole milk for a richer structure or semi-skimmed for a slightly lighter brioche.
Aromas: Alongside lemon zest, vanilla bean paste blends wonderfully with the buttery dough.
Storage
Stored in a plastic bag, they keep fresh for up to 3 days. Using a stand mixer ensures proper gluten development, which helps lock in internal moisture longer.
Recipe Variations and Alternatives
Italian Style: Fill with apricot jam brushed over them while they are still warm.
Chocolate Chip: Fold freezer-chilled mini chocolate chips into the dough during the last 30 seconds of mixing in the stand mixer.
Tips and Tricks
Dough Temperature: If you notice the stand mixer bowl feeling hot to the touch, pause and put the dough in the freezer for 10 minutes. Excessive heat kills the yeast!
Speed: Never exceed medium speed; the stand mixer needs to work with strength but without “racing.”
Frequently Asked Questions (FAQ)
1. Why won’t the dough pull away from the sides of the bowl?
The eggs might have been too large, or the flour didn’t absorb enough liquids. Add an extra tablespoon of flour gradually until the dough comes together and cleans the bowl.
2. Can I prepare the dough the night before?
Certainly! After the first rise of about an hour, place the covered dough in the refrigerator overnight. It will develop an even better structure and be wonderfully digestible.
3. Should the whipped cream be added while the buns are warm?
Absolutely not. Wait until they are completely cold before cutting them, or the cream will melt instantly upon contact.
Varied doses for servings