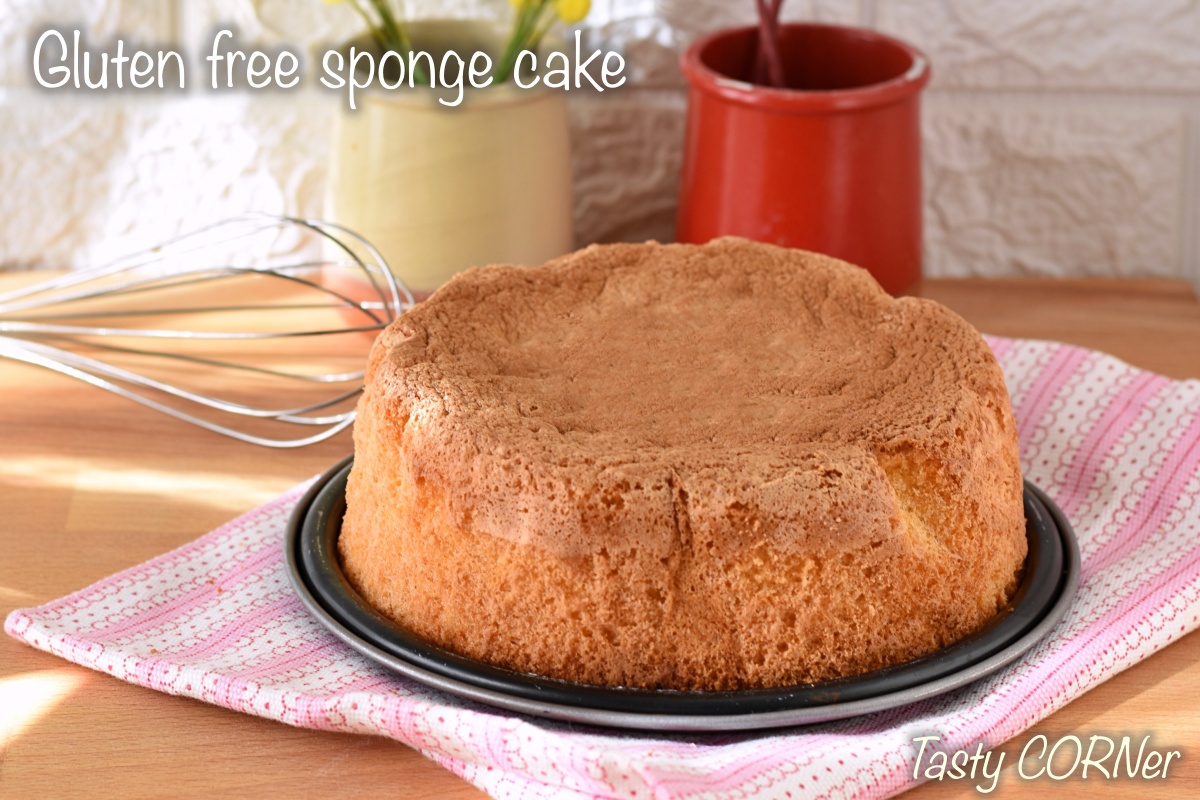
The gluten free sponge cake is a basic recipe that will be useful to prepare gluten-free desserts of all kinds: birthday cakes, tiramisù, layer caks, trifle… the sponge cake, as everyone knows, is a cake prepared with eggs, sugar and flour, without yeast and butter or other fats. The result is a soft dough, perfect to soak with coffee or other alcoholic and alcohol-free syrup. It is also perfect to be filled with various cream. It is important therefore that it remains firm but soft.
Getting a soft gluten free sponge cake that does not crumble is simple and easy if you follow some tips to the letter. The first and most important tip is to use eggs at room temperature: the eggs just taken from the fridge won’t whip enough for rising in the oven. Then, don’t rush: eggs and sugar have to be beated long, up to 10 minutes, with the electric whisks or even better with a stand mixer, until they become light and fluffy. My last tip is to sift carefully and mix well the flour, to make sure that no lumps are formed.
Instead of wheat flour you will need finely ground rice flour, to be mixed with a little corn starch. You can also use potato starch in place of corn starch, but it might not work as well as the latter. Using corn starch I obtained a perfect gluten free sponge cake, that does not crumble.
When you bake the gluten free sponge cake it’s very important not to open the oven during the first 30 minutes; then check the cooking with a toothpick (it should comes out clean) and, once ready, leave it in the oven off slightly open for another 10 minutes: so you’ll keep the gluten free sponge cake from deflating for the change in temperature.
You might also like these recipes:
Ingredients for a 7 inch glutenfree sponge cake
Tools
How to prepare the gluten free sponge cake with rice flour and corn starch
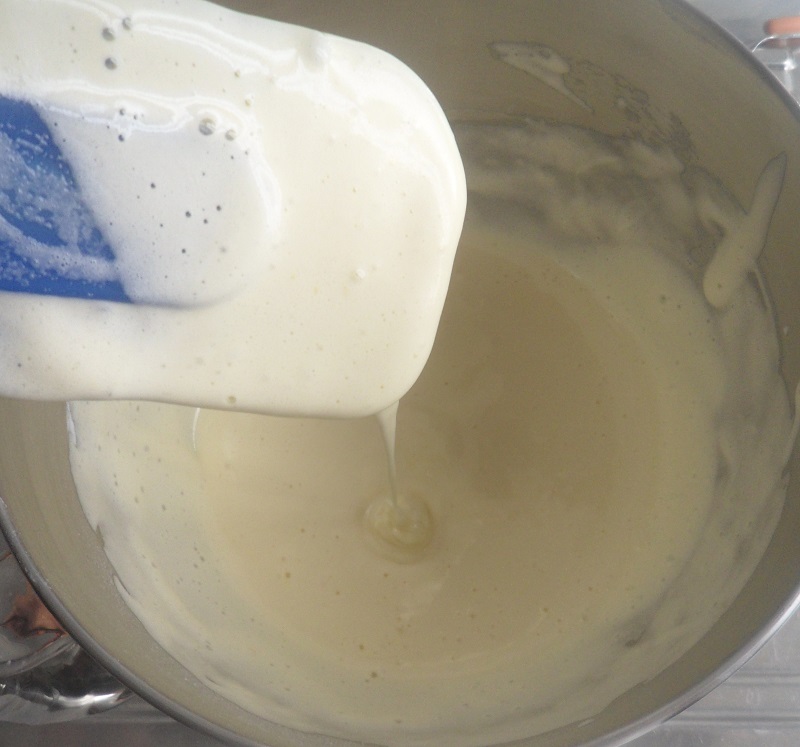
To prepare the gluten free sponge cake start by leaving the eggs at room temperature for at least 30 minutes, otherwise they won’t whip. Shell them in a bowl and add sugar and salt. Beat with the electric whisks (or in a stand mixer with wire whip) for about 10 minutes, until you get a light and fluffy mixture.

In technical slang it is said that the sponge cake eggs must “write” for a perfect whipping: it means that raising the whisks from the bowl, the leaking mixture must leave a trace on the one left inside the bowl. If you want to know more about it, you can see the video tutorial in this recipe.
Sieve the rice flour, corn starch and vanillin mixed together. Mix them with the eggs, mixing gently from bottom to top. Mix carefully, making sure there are no lumps left.
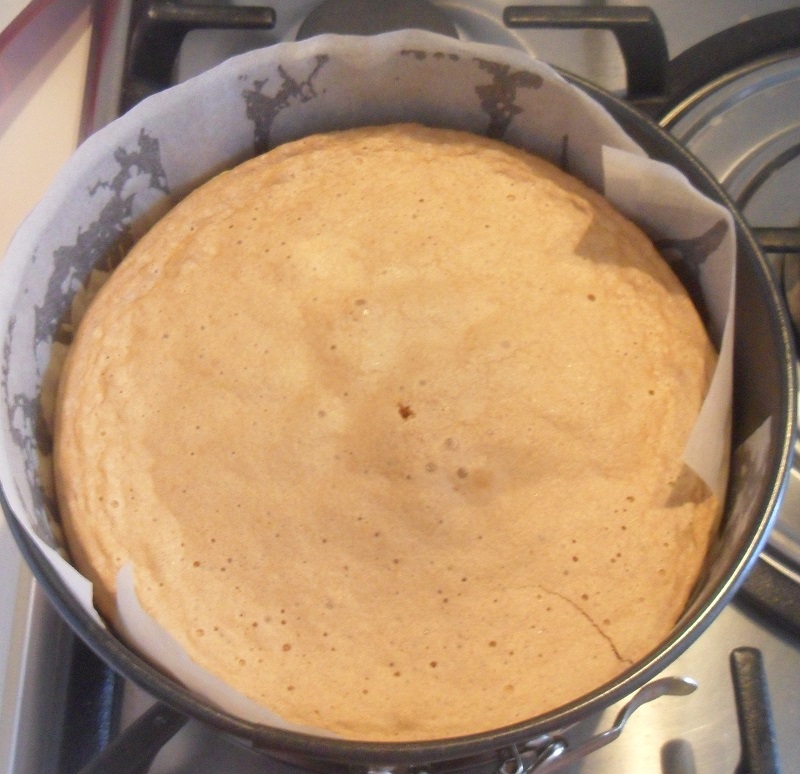
Line a baking tray of 7 inches in diameter with the baking paper (7). Pour the dough in the baking tray, leveling it with a spatula. Bake the gluten free sponge cake in the preheated static oven at 338°F (170° C) on the middle-lower shelf for 35 minutes; then, check the cooking with a toothpick, that should comes out perfectly dry.
Once you’re sure it is dry, you can turn off the oven and leave the gluten free sponge cake inside it for another 10 minutes, leaving the oven door slightly open. Otherwise, extend the cooking for another 5-10 minutes.
Bake it off and let it cool down before remove it from the baking tray. Once warm, get it out from the tray and carefully remove the baking paper. Then let it cool completely on a wire rack before slicing.
Use the gluten free sponge cake as a base for any layered cake, tiramisù or trifle!
 Qui trovare la versione italiana di questa ricetta!
Gluten free sponge cake doses
Using the doses I gave you and a tray of 7 inches in diameter you will obtain a rather tall cake, perfect to be filled with two layers of cream. If you need a wider base to fill with a single layer of cream you can follow the same recipe but cook the dough in an 8-inch pan, reducing the cooking time by about 5 minut
How to store the gluten free sponge cake
You can keep the gluten free sponge cake covered with a plastic film. It remains soft for 3 days.
Tips on preparation
A well ground rice flour is the best trick for a perfect gluten free sponge cake; if you can’t find it, you can put a common rice flour in the blender and blend it at high speed for a few seconds.
How to soak the sponge cake
The sponge cake is generally used as a base for any layered cake or sweets; it is almost always soak with some cake syrups to soften its dry texture. The classic tiramisù calls for coffee (bitter or slightly sweetened), of course. If you need to prepare a non-alcoholic sponge cake for children, you can soak it with fruit juice or milk.
If, however, we talk about the classic birthday cake, you can soak the sponge cake with an alcoholic syrup, made with your favourite liqueur.
Sponge cake: with or without baking powder?
Sponge cake is usually prepared without baking powder. The reason is very simple: if we add baking powder, assuming that the sponge cake is turn out well and isn’t collapsed in the middle, we’ll get a cake with a different texture with a more honeycombed crumb, less suitable to absorb the syrup and to hold the cream.
Preparing the sponge cake without yeast will be quite easy if you have a stand mixer. But if you follow my tips, you can get a tall and fluffy sponge cake even using the electric whisks and without adding the yeast.
Translation by Giacomo Meucci
Varied doses for servings